NETSH 사용법
Netsh 는 로컬 또는 원격으로 현재 실행 중인 컴퓨터의 네트워크 구성을 표시하거나 수정할 수 있는 명령줄 스크립팅 유틸리티입니다. Netsh는 또한
OvenMediaEngine은 AirenSoft의 Docker Hub(airensoft/ovenmediaengine) 저장소의 Docker 이미지를 지원합니다. Docker를 설치한 후 다음 명령을 실행하기만 하면 됩니다.
docker run -d \
-p 1935:1935 -p 4000-4005:4000-4005/udp -p 3333:3333 -p 3478:3478 -p 8080:8080 -p 9000:9000 -p 9999:9999/udp -p 10006-10010:10006-10010/udp \
airensoft/ovenmediaengine:0.12.9
다음 환경 변수를 설정할 수 있습니다.
| Env | Default Value |
|---|---|
| OME_ORIGIN_PORT | 9000 |
| OME_RTMP_PROV_PORT | 1935 |
| OME_SRT_PROV_PORT | 9999/udp |
| OME_MPEGTS_PROV_PORT | 4000-4005/udp |
| OME_HLS_PUB_PORT | 8080 |
| OME_DASH_PUB_PORT | 8080 |
| OME_TCP_RELAY_ADDRESS | * : 3478 |
| OME_ICE_CANDIDATES | * : 10006-10010/udp |
| OME_SIGNALLING_PORT | 3333 |
OvenMediaEngine은 다양한 오픈 소스 및 라이브러리와 함께 작동할 수 있습니다. 먼저 아래에 설명된 대로 깨끗한 Linux 시스템에 설치합니다. OME는 대부분의 Linux 패키지를 지원할 수 있다고 생각하지만 테스트한 플랫폼은 Ubuntu 18+, Fedora 28+ 및 CentOS 7+입니다.
root@k5w1hcd-155052:~# (curl -LOJ https://github.com/AirenSoft/OvenMediaEngine/archive/v0.12.9.tar.gz && tar xvfz OvenMediaEngine-0.12.9.tar.gz)
root@k5w1hcd-155052:~# OvenMediaEngine-0.12.9/misc/prerequisites.sh
  % Total    % Received % Xferd  Average Speed   Time    Time     Time  Current
                                 Dload  Upload   Total   Spent    Left  Speed
100   134  100   134    0     0    465      0 --:--:-- --:--:-- --:--:--   463
100 11.2M    0 11.2M    0     0  8535k      0 --:--:--  0:00:01 --:--:-- 7637k
curl: Saved to filename 'OvenMediaEngine-0.12.9.tar.gz'

~~~~~~~~~~~~~~~~~~~~~~~~~~~~~~~~~~~~~~~~~~~~~~~~~~~~~~~
OvenMediaEngine 소스가 다운로드 된다.
~~~~~~~~~~~~~~~~~~~~~~~~~~~~~~~~~~~~~~~~~~~~~~~~~~~~~~~

OvenMediaEngine-0.12.9/src/projects/web_console/web_console_server.cpp
OvenMediaEngine-0.12.9/src/projects/web_console/web_console_server.h
root@k5w1hcd-155052:~# OvenMediaEngine-0.12.9/misc/prerequisites.sh
소스 다운로드후 스크립트가 입력되면 엔터를 입력해서 바로 실행하면 설치가 진행된다.
prerequisites.sh 스크립트가 실패하면 수동 설치를 진행하십시오.
You can build the OvenMediaEngine source using the following command:
sudo apt-get update
cd OvenMediaEngine-0.12.9/src
make release
sudo make install
systemctl start ovenmediaengine
부팅시 자동으로 시작을 하려면 다음을 입력하세요.
systemctl enable ovenmediaengine.service
The default configuration uses the following ports, so you need to open it in your firewall settings.
| Port | Purpose |
|---|---|
| 1935/TCP | RTMP Input |
| 9999/UDP | SRT Input |
| 4000-4005/UDP | MPEG-2 TS Input |
| 9000/TCP | Origin Server (OVT) |
| 80/TCP | HLS & MPEG-Dash Streaming |
| 3333/TCP | WebRTC Signalling (both ingest and streaming) |
| 3478/TCP | WebRTC TCP relay (TURN Server, both ingest and streaming) |
| 10000 - 10010/UDP | |
| WebRTC Ice candidate (both ingest and streaming) |
You can open firewall ports as in the following example:
$ sudo firewall-cmd --add-port=80/tcp
$ sudo firewall-cmd --add-port=1935/tcp
$ sudo firewall-cmd --add-port=9999/udp
$ sudo firewall-cmd --add-port=4000-4005/udp
$ sudo firewall-cmd --add-port=3333/tcp
$ sudo firewall-cmd --add-port=3478/tcp
$ sudo firewall-cmd --add-port=9000/tcp
$ sudo firewall-cmd --add-port=10000-10010/udp
OBS, XSplit 및 OvenStreamEncoder와 같은 라이브 인코더를 사용하여 라이브 스트리밍할 수 있습니다. RTMP URL을 아래와 같이 설정하세요.
rtmp://<Server IP>[:<RTMP Port>]/<Application name>/<Stream name>
각 항목의 의미는 다음과 같습니다.
< Server IP > : IP address or domain of the OvenMediaEngine server.
< RTMP Port > : You can use < Port > of < Provider > in the above Server.xml file. With the default configuration, the RTMP default port (1935) is used. Also, by setting the default port, you can omit the port.
< Application name >: This value corresponds to < Name > of < Application > in conf/Server.xml. If you use the default configuration, you can use the app.
< Stream name >: Name of the stream you defined.
위의 RTMP URL을 인코더에 입력하고 퍼블리싱을 시작하면 플레이어가 라이브 스트림을 볼 수 있는 환경이 됩니다.
OvenLiveKit은 전송 SDK입니다. 따라서 이 SDK를 사용하여 앱에 브로드캐스트 전송 기능을 쉽게 추가할 수 있습니다. 그리고 OvenStreamEncoder는 OvenLiveKit으로 만들고 사용할 수 있음을 보여주는 샘플 앱입니다. Google Play에서 OvenStreamEncoder를 검색하여 사용할 수 있습니다.
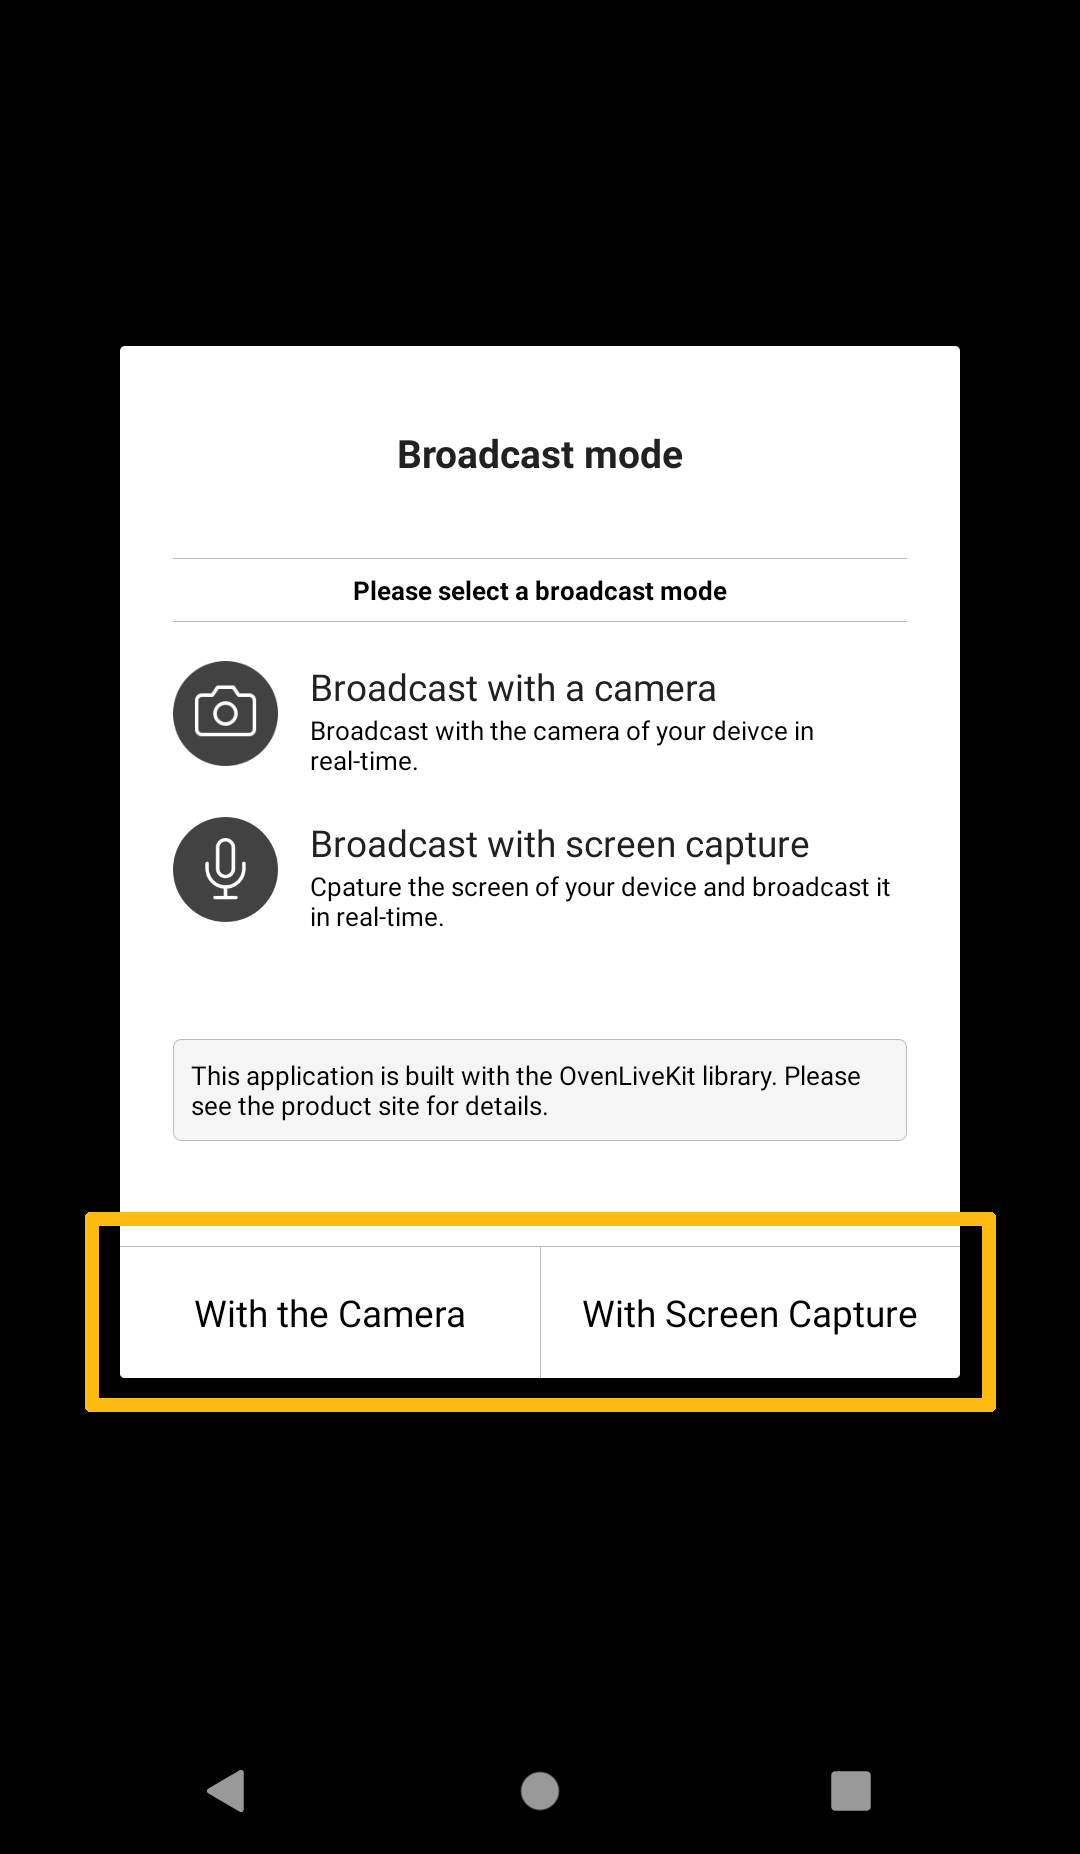
OvenStreamEncoder는 카메라로 녹화된 화면을 스트리밍으로 구현하는 모드와 현재 화면을 캡쳐하여 스트리밍하는 모드를 지원합니다.
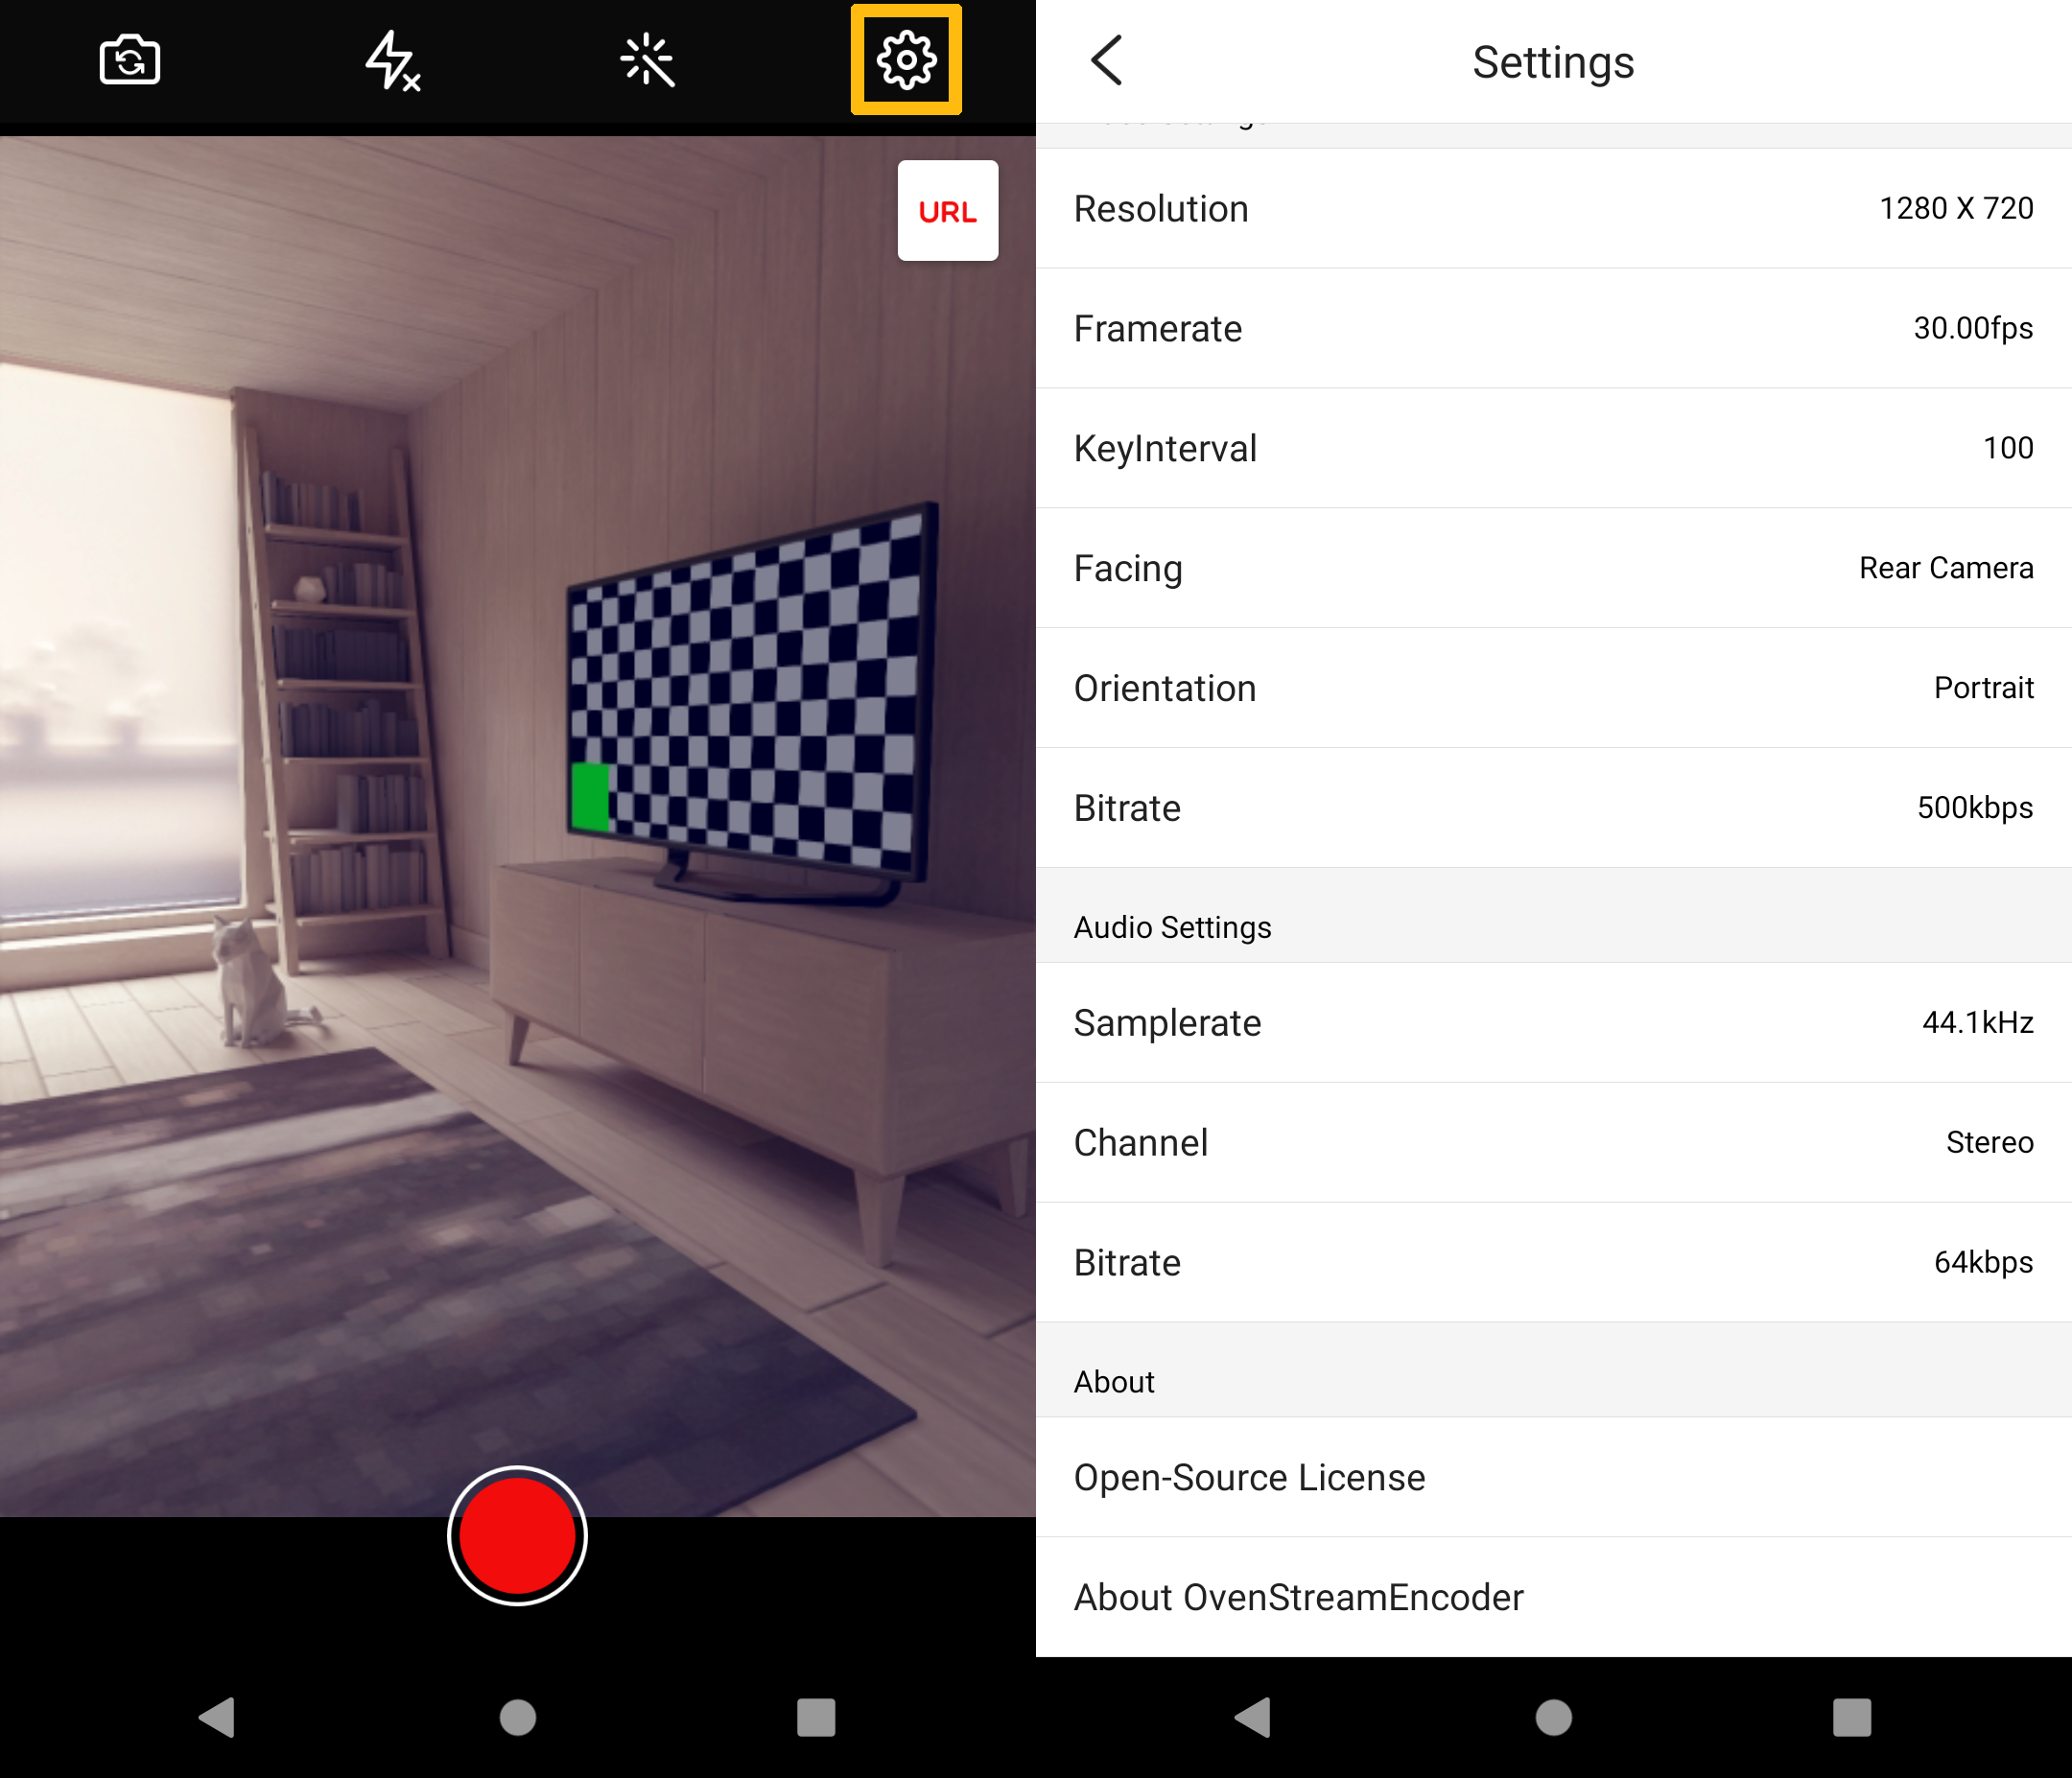
따라서 원하는 방송 컨셉에 따라 모드를 선택하고 우측 상단의 설정 아이콘을 눌러 최적의 설정을 진행합니다.
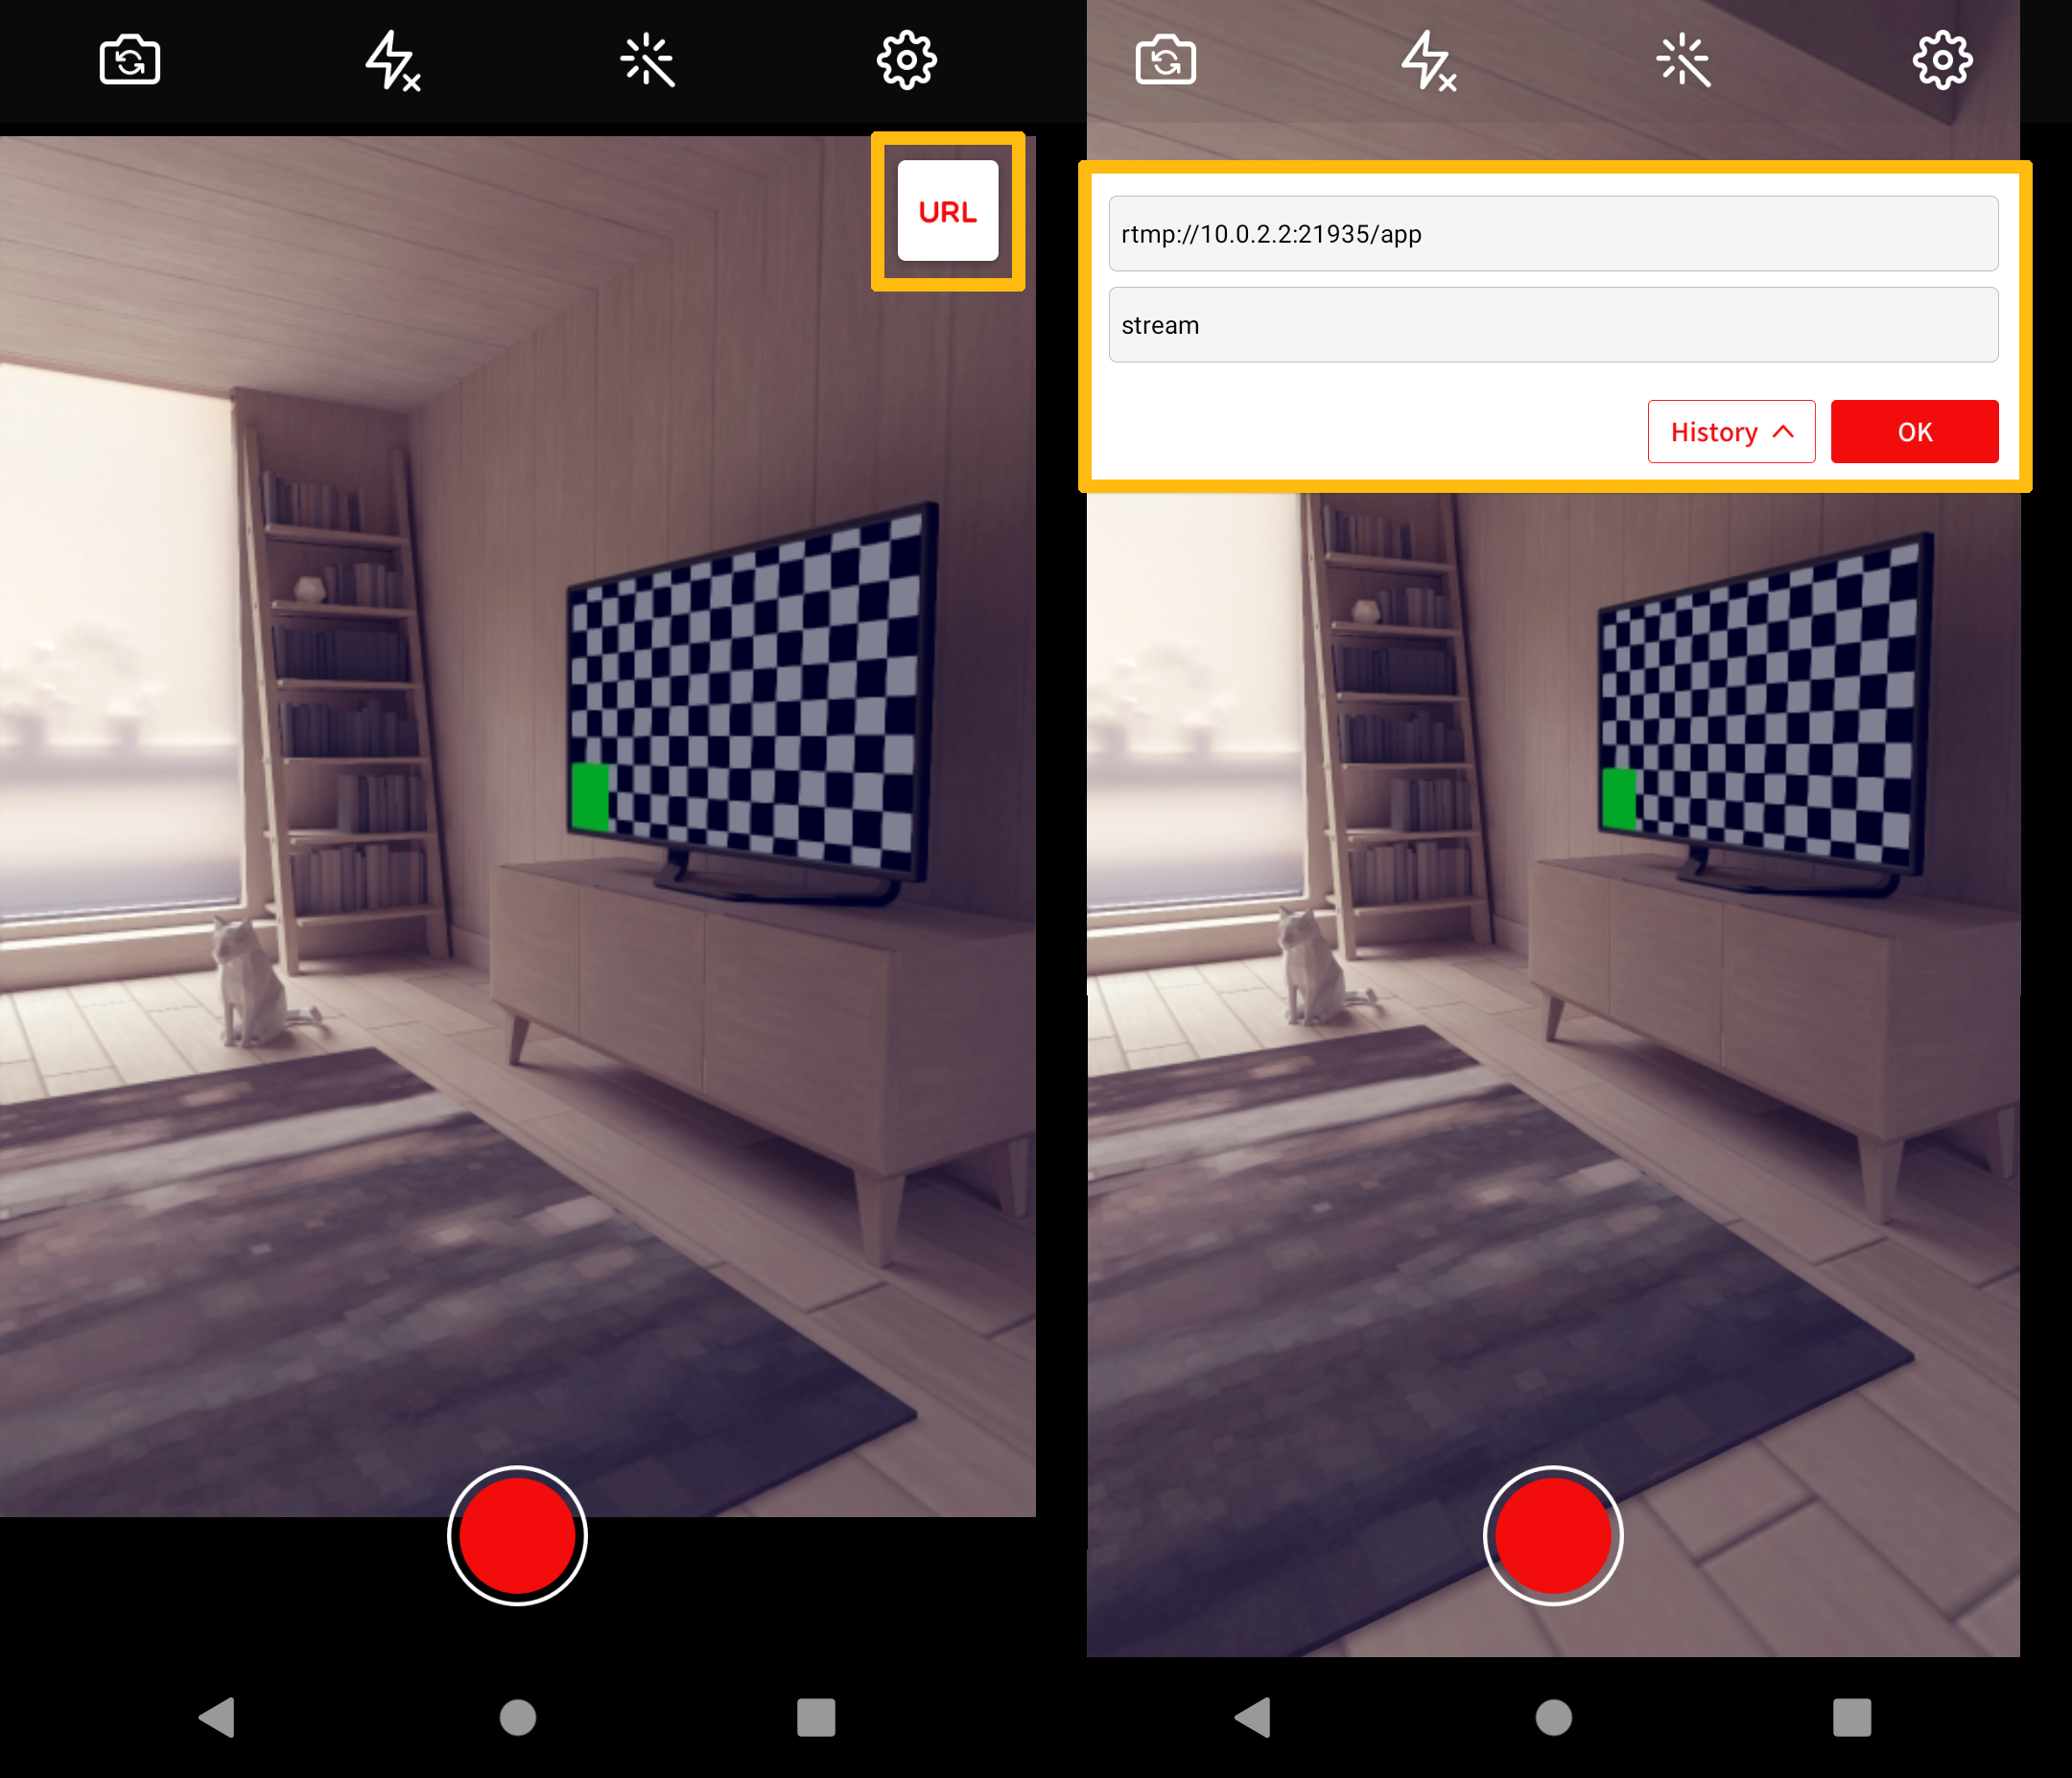
방송 설정 후 원래 화면으로 돌아가서 우측 상단의 URL 버튼을 누르고 RTMP URL과 Stream Key를 입력하여 전송합니다.
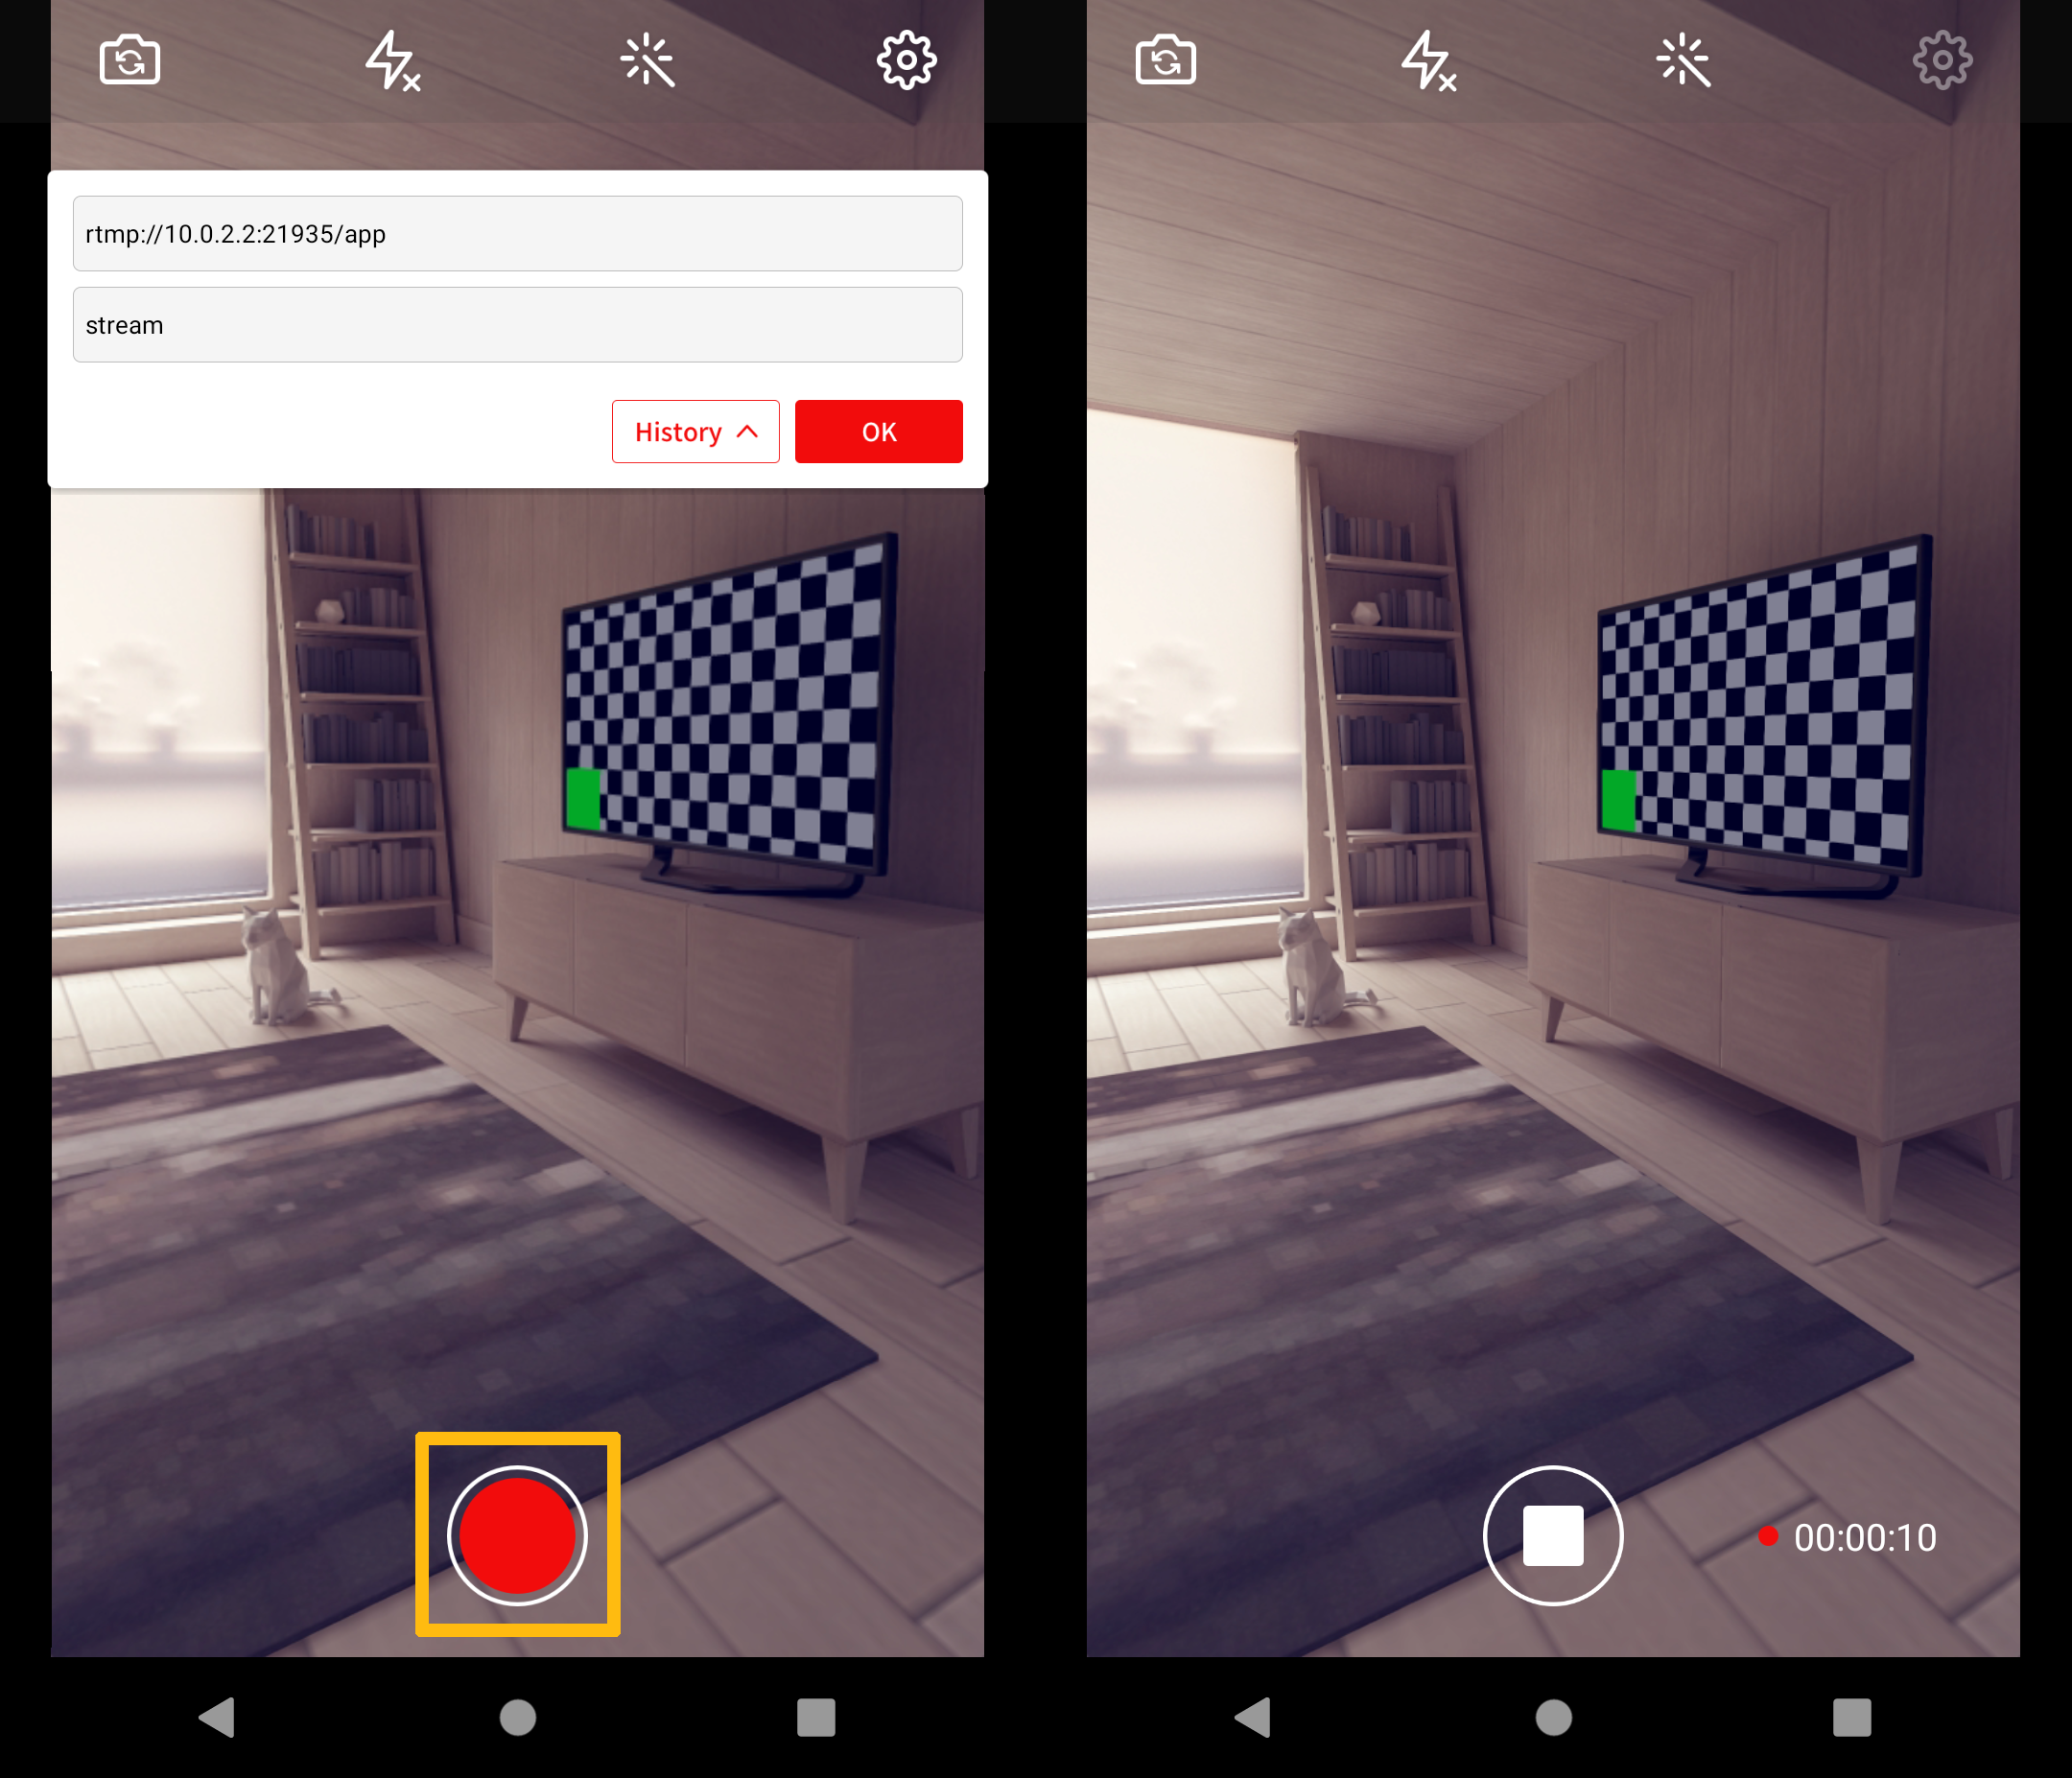
모든 준비가 되었으면 중앙 하단의 녹화 버튼을 눌러 방송을 시작하세요.
또한 OvenStreamEnecder가 OvenMediaEngine에 얼마나 최적화되어 있는지 테스트를 실행했습니다. 관심이 있으시면 여기를 클릭하여 확인하십시오.
OBS의 서버 주소는 Server.xml에서 생성된 < Application name >을 사용해야 합니다. 기본 구성을 사용하는 경우 앱이 이미 생성되어 사용할 준비가 된 것입니다.

Press "Service" and select "Custom", your OBS is the same as this image.